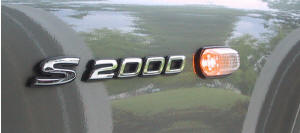
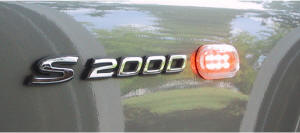
I've been wanting to do this mod to my car for a year.  I never liked the cheesy-looking side marker lights on the S2000.  They look like they were just stuck on the side of the car as an after-thought.  The JDM clear markers are a big improvement, but I wanted something different.

So I decided to put VW Beetle lights on my car.  Yes, you heard right, Volkswagen New Beetle side markers.  Not only are they clear, but they are low-profile, and they use LED's instead of light bulbs.  Now I'm definitely way cool, not to mention half a second faster in the quarter mile.  Some of my friends think the NOS made the car faster, but I know better.  It's actually my too-cool-for-school VW side markers. 

JDM clear side markers VW New Beetle markers - the LEDs' appear brighter than the stock lamps, but use less than half the power.


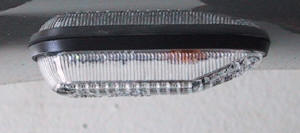
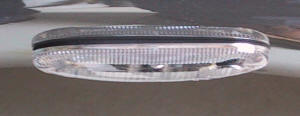
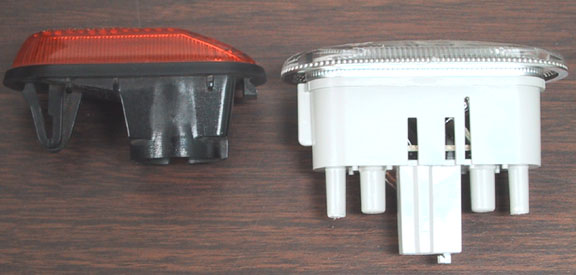
Profile view of JDM Thinner profile of VW light


Check out this photo of the stock side turn signal, and the VW light assembly.
The VW light has a much lower profile, and comes with a soft rubber gasket so it fits tight.
What it does:

This mod replaces the original ugly-as-hell side marker lights with cool-looking LED VW Beetle lights.  This is not an easy mod.  The work is not hard, just tedious, as you have to remove about 1/4" of the plastic VW light housing to get it to fit in the S2000 cut-out.  The JDM lights change out in 2 minutes.  It took me 2 hours to get the VW lights installed in my car.

Skills and tools required to install:

bulletFile and grind and otherwise mutilate VW plastic light housings.
bulletLoosen the inside fender well plastic cover (2 screws and some clips).
bulletSoldering iron to connect new wires to the VW lights.
bulletCrimp tool for wire connectors.
bulletTorx head wrench (T-20?) to fit screws on  new lights.  Use a small L-shaped wrench, not a screw-driver type, as there's not much room in the fender.  You can use a hex wrench if you don't have a Torx.  The screws don't take much torque to tighten.

Parts required:

bulletTwo VW Beetle side markers (turn signals) from a late 2000 through 2002 New Beetle.  Part #1C0-949-101-A.  Earlier lights use light bulbs and as such do not qualify as "cool".  These are not cheap ($47 each from dealer), so you may want to try a junk yard.
bullet18 gauge wire and 1/4" male spade wire connectors.

Installation Procedures:

  1. Trim off the small "lip" on each plastic post, as shown in photo A.
  2. Remove the two screws, the black plastic clamping brackets, and the rubber gasket.
  3. Trim off about 1/8" from each side of the housing, as shown in photo B.  Also trim the plastic around the terminals, to expose them for soldering.  Be very careful, use a Dremel tool or fine-tooth hack saw and proceed slowly.  I got hasty and used my radial arm saw on one of mine, and split the plastic housing.  Also be careful not to cut into the back side of the clear plastic lens.  The back side is chrome-plated, and if you scratch it, it will show through the front.
  4. Solder wires to the terminals, and attach a 1/4" male spade connector to each wire. 

Note: The VW lights are not sealed on the back side.  I don't know if this will cause a problem or not, since the Honda fenders are shielded from rain and splashing, but not from humidity.  You may want to use some good electrical tape or silicone sealant to seal up the back side of the housing.  I taped mine.  It's not pretty, but I'm not going to be looking at it.

  1. Put the rubber gasket back on.  Photo C shows the finished light assembly.
  2. Remove the stock lights by pushing the housing toward the front of the car, and pull out on the back edge.  The lights are just a snap-fit into the fender.  See photo D.
  3. Disconnect the stock light from the wiring connector, and plug in the new VW light.  Don't worry about polarity (+ and -) at this time, just plug in the wires.  Leave the new light hanging out of the fender, and turn on the Emergency Flashers.  If the light blinks, the polarity is correct.  If it doesn't, turn off the Flashers, swap the wires, and try again.  You can't hurt the light by getting it backwards, just don't short the wires to the fender while you are working.
  4. Now open up the inside fender cover by removing two screws and some of the plastic clips on the fender edge.  The plastic bends easily, and you will need to reach into the fender to screw the black clamping brackets back on the lights, to clamp the lights in place.  It's a pain to crank the screws in, because it's a little cramped in there, but it's not too bad with a right-angle Torx wrench.  You can use a regular hex-head wrench if you don't have a Torx.
  5. Test the light one more time, then put the screws and clips back in the fender cover.
     

You may click a photo for an enlargement.

(A)  Cut the little lips off of the posts (B)  Trim both sides of the light
and the plastic around the connector


(C) After trimming and adding wires.
Click on this pic to see how I screwed up trimming the plastic housing.
(D) How to remove stock light
Push forward, then lift away from fender.